AwesomeMounter: join plug’n’play drives into a single large directory
Have you ever run out of space, and decided to offload some of the bigger files to a second (or third…) disk? Sometimes even an external drive?
Are you tired of having to look around all disks in order to find that specific file?
Well, you’re in luck!
Because AwesomeMounter is an awesome program that will get you rid of all that mess, without ever needing to know what LVM, RAID, or even filesystem means.

(…probably!)
AwesomeMounter is free and GPLv3. Based on inotify and mhddfs [en], it’s actually a pretty simple bash script (so if you’re interested, you can easily tinker with it).
What can AwesomeMounter do?
Here’s an example. You’ve got 3 places where you store music: your Linux home (50 gigs), a Windows partition (100gigs), and an 8 gigs USB pendrive:
/home/foo/music/(has reggae and jazz subdirectories)/mnt/windows/data/mp3/(has pop and jazz subdirectories)/media/pendrive/songs/(has hiphop and electro subdirectories)
And you want all the music in a single place. Namely:
/music/(will contain all the aforementioned music)
With AwesomeMounter, you can access music through the 3 original paths, or through /music/, like this:
/music/ (total size: 50+100+8 = 158 gigs!)/reggae/pop/jazz/hiphop/electro
How cool is that?
Plug-n-Play!
With AwesomeMounter, you gain the ability to disconnect (or umount) any drive at any time.
Reciprocally, whenever a previously set-up drive is connected or mounted again to your system, the data will automatically reappear where the AwesomeMounter config files tells it to.
This makes it perfect in combination with external drives, such as pendrives, USB hard disks, cellphones, memory cards…
Continuing the example: the USB pendrive at /media/pendrive/, can be removed as you normally would (e.g. right click -> unmount drive), and /music/hiphop and /music/electro will automatically disappear from /music.
Storage balancing!
(a.k.a. what happens when I write stuff in there?)

Any new file you try to write, will automatically be put in the drive with the most free space.
E.g.: If your pendrive is full, data will be stored somewhere else.
If you need to write stuff to a specific drive, you can bypass this awesome automatic storage balancing. by simply using the corresponding original path at /media/pendrive/*, instead of the joined path that AwesomeMounter made available to you at /music/.
How do I use it?
First, copy the script anywhere on your disk, and give it execution permissions.
Then, create a configuration file at ~/.awesomemounter/config. Example file:
##########################
# some configured dirs:
/music /home/foo/music,/media/pendrive/songs
/movies /home/foo/videos,/media/bigHDD
/downloads /home/foo/incoming,/mnt/windows/p2p
# you can nest mounts w/out problems
/video /movies,/downloads/series,/home/foo/docus
##########################
Then simply run awesomemounter from command line (you may be prompted for root access):
$ ./awesomemounter.sh
That’s it!
Where do I get it?
 AwesomeMounter is available at GitHUB:
https://github.com/stenyak/AwesomeMounter
Don’t forget to create the config file!
DISCLAIMER: Use at your own risk. If your house burns down because of it, don’t blame me. Instead, call the firefighters and only then don’t blame me.
Crash course in Wave and Apache Wave
This articles tries to give a brief introduction to that ‘Wave‘ thingy everyone used to talk about, explaining the concept, history overview and even how to get it running by yourself.
Quick history lesson
At the Google I/O conference on May 27, 2009, Google announced this new communication concept: “Wave”. Most technical people attending the event “got it” right away and applauded.
Later that year, Wave was open for testing through the typical invite system. Google Wave, however, was still half baked and unusable. Most of the critics dismiss it as yet another unnecessary social network, a solution waiting for a problem, etc.
Nearing the end of 2010, statistical analysis at Google showed the public reception wasn’t as good as expected. Google decides to pull the plug and open source parts of it, deviating resources to other projects.
Before the year 2010 ends, with many parts of it open sourced by Google, the small dev community gathers the pieces, and starts the new Apache Wave project.
Nowadays, in 2011, Apache Wave is actively developed by the open source community, and an alpha version can be easily run in your computer.
Cool… what was “wave” again?
For the computer literates, here you have two easy to understand comparison tables, using email as a reference:

| Concept description | E-Mail term | Wave term |
|---|---|---|
| A piece of information | an email | a wave |
| The act of sending a piece of information | to email someone | to wave someone |
| Protocol | SMTP, POP3, IMAP... | Wave Protocol |
| Interaction between different servers | ability to send email from one @domain to another @domain | wave server federation |
| Development of the project concepts and reference software | IETF + independent developers? | Apache Wave |

| Software description | E-Mail software | Wave software |
|---|---|---|
| Proprietary server+webclient package | Yahoo! Mail | Google Wave |
| Open source server+webclient package | Zimbra | Wave In A Box |
| Open source server | Exim | Google FedOne |
| Open source client | Thunderbird | Google Wave-Splash |
| Open source webclient | RoundCube | Micro-Box |
What can Wave be used for?
Wave aims to be a common denominator to many other communication forms. An open standard that anyone can use and implement (even in the form of proprietary servers or clients, like Google Wave). Let’s see an example:
In a common use case, your internet workflow could involve:
- An email client running on your desktop
- Twitter client
- Facebook tab
- An feed reader
- Receiving messages from two mailing lists
- Manually checking some random movie forums weekly for new posts
- Get notified by email of replies to some blog post comments you wrote
In the wave world case, your internet workflow would involve:
- A Wave client
- Or, alternatively, go the old route: keep using the very same specific clients for each of those services, even if they use the Wave Protocol under the hood (just like Facebook Chat and GTalk run on top of Jabber).
Most importantly, and this cannot be stressed enough:
You are free to choose which clients to use as interface.
And you are also free to choose which servers to use for storing your data waves.
Now try doing that with Facebook, Twitter, Flickr…
Test a WaveInABox demo now
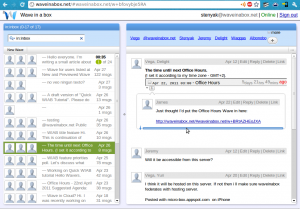
So you want to test the open source Apache Wave software? The wave community runs some test servers and clients on the net. The most common one is located at http://waveinabox.net, and is updated daily.
Disclaimer: WaveInABox server and client are still in very early development stage, so do not rely on them at all, and do not expect everything to work correctly.
Or deploy your own WaveInABox
Maybe you want to test it locally, perhaps play with the code, or even run it privately for personal purposes. In that case, it’s really easy to get it up and running in Linux:
# apt-get install mercurial ant default-jdk eclipse
$ hg clone https://wave-protocol.googlecode.com/hg wave-in-a-box
$ cd wave-in-a-box
$ ant compile-gwt
$ ant dist-server
$ ant -f server-config.xml -Dwave_server_domain=$HOSTNAME -Dsigner_info_store_type=file -Daccount_store_type=file -Ddelta_store_type=file -Dattachment_store_type=disk
$ ./run-server.sh
(there’s instructions for Windows and MacOSX too)
At this point, the server is running, and the web client can be accessed at http://localhost:9898.
Final words
Even if this article is very shallow, I hope it provides a different perspective of the whole subject, and helps people see the actual purpose behind the waves.
By the way, I’m reachable at stenyak@googlewave.com and stenyak@waveinabox.net. Feel free to wave me any time! 😉
Surfing the electromagnetic waves – Debugging IEEE 802.11 with Wi-Spy
Some months ago, when I moved to this house, I found it was pretty difficult to get any WiFi device to connect to my wireless home network. Recently I tried debugging it, and these are the results…
Finding a proper WiFi channel
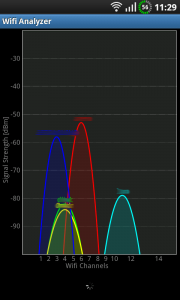
Finding an appropriate WiFi channel is part of the usual initial setup. Some routers and APs can choose channels automatically, but that’s not my case, so I had to resort to third party applications. One of my favourites is Wifi Analyzer for Android, which looks like this:
You can see what channels are used by which networks, and so the less used channels can be easily spotted. In my case, I decided to go for channel 10, which was pretty much free.
I tested Wi-Fi networks with 2 different routers, 1 dedicated AP, 2 Android phones, 1 iOS device, 1 laptop and 2 netbooks. Some specific combinations of them seemed to work, but most of them didn’t, sometimes even if they were in the same room as the access point.
How could this be?
Extending Wi-Fi range with WDS
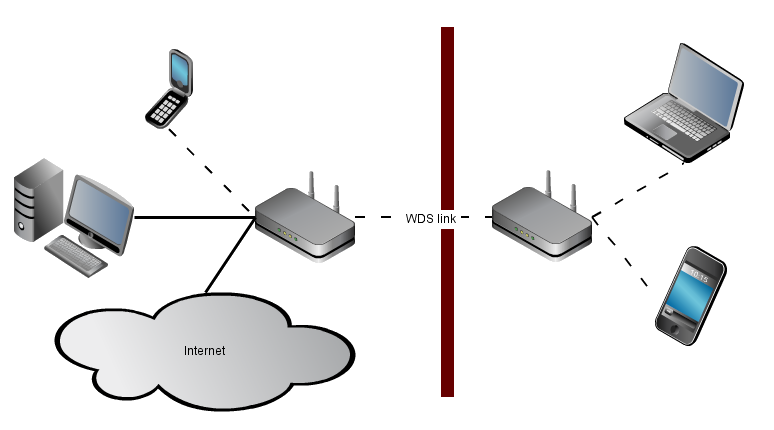
First of all, I thought that the thin room walls might be thicker than I initially supposed. Therefore, I decided to put an AP in each of the two rooms I wanted to wirelessly link together.
One of the easiest ways is to use a Wireless Distribution System (WDS). You set up each of the two APs with the other’s MAC address, do some reboots, and off you go.
However, simple ping tests demonstrated I was still having a packet loss as high as 40%. Even if the APs were just a meter and a wall away from each other!
Extending Wi-Fi range with FEC
 So the next option was to get a stronger signal in the other room, not with WDS, but using a Freaking Ethernet Cable. Once I got hold of a 10 meters cable, I plugged an AP at the end of the cable, in the other room.
To my dismay, it was barely possible to get a MacBook Pro to connect to the AP. There was a distance of 50 cm between the two!
So apparently, the wireless signal was being lost inside the room, and not due to the wall (this quickly ruled out the possibility of my walls being built of a thin layer of pure lead….).
Checking for electromagnetic interferences
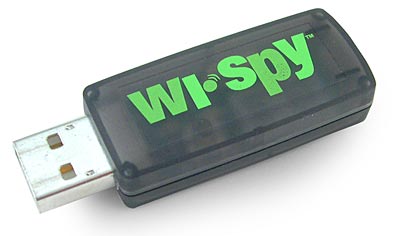
Next up, and thinking it could be some sort of EMI, I decided to get help at the mailing list where the local computer geek^H^H^Hurus hang around, the e-ghost. A few emails later, and thanks to the kindness of @txipi, I was holding a USB 2.4GHz spectrum analyzer on my hands.
The Wi-Spy 2.4i is a nice piece of hardware, with a similar functionality to the WiFi Analyzer program mentioned at the beginning of this article. Main difference being, it can detect all kinds of EM signals (not just those identified as wifi networks). For example, it’ll pick up signals coming from bluetooth devices, wireless security cameras, microwave ovens, baby monitors, etc.
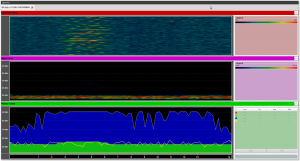
There’s some tools for linux, which can be installed with sudo apt-get install spectools, and look like this:
There’s also native software for Windows in the Wi-Spy CD which I sadly had to use, since I couldn’t configure the timescale of the spectrographs on linux spectools.
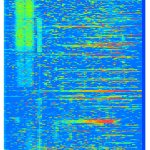
Once the software was correctly set up, I disabled my 802.11 network completely, and started logging data. Here’s the spectrograph for a period of about 30 non-continuous hours:
Vertical axis is time, horizontal axis is the frequency (wifi channel numbers are shown at the bottom for your convenience), and color axis is the maximum signal power.
Analyzing the 2.4GHz spectral graph
Several interesting patterns emerge from the graph:
 First of all, there’s these red-yellow dots all over the spectrograph. They seem to represent network scans made by wifi devices every once in a while. The pattern can be consistently repeated by turning the WiFi of any device OFF and then ON; or by simply trying to refresh the list of networks.
 Then there’s the prominent vertical patterns hovering around channels 1, 2 and 3. These obviously represent other existing WiFi networks around my house. There are other similar vertical patterns that cannot be easily appreciated with the color coding in this graph, but they’re logically low signal and won’t interfere much anyway.
Conclusion
I suspect it is this last type of interferences which makes my WiFi connectivity act so erratic. Sometimes, all my devices will connect just fine, but sometimes it’s impossible to connect even 10cm away from the AP.
It’s possible that a Police station located half a kilometer away (with direct line-of-sight) produces it, or maybe it’s the hardware of some neighbors. Building a huge Faraday cage is unthinkable, and hopping from channel to channel has proven useless, so I guess I’m irrevocably stuck with wired conections until I move to another house.
On the bright side, debugging these WiFi issues surely has been an interesting fun ride 🙂
Since I am by no means an expert in telecommunications, any further explanations or corrections are more than welcome. Feel free to use the comments box below!
Yuki TV
Akí teneis a Yuki en vivo y en diferido!
No estaba muy activa en ese momento, pero a veces se pone a dar vueltas por el sofa y no hay quien le haga una foto, así que mejor así.
12.18.09The Chuck Norris Facts Bash Script
Pon un Chuck Norris en tu vida! O mejor aun, pon miles de Chuck Facts en tu consola!
Bored STenyaK Productions presents: chuckfacts.sh!

Coming this winter to a console in front of you…
#!/bin/bash

# check for parameters
if [ -z $1 ]
then
    echo "Please specify the destination chuck norris facts file."
    echo "E.g.: $0 ~/.chuckfacts.txt"
    exit
fi
ffile=$1

old=0
if [ -s $ffile ]
then
    old=$(wc -l $ffile |sed "s/\s.*//g")
fi

echo -n "Getting facts pack"
# download the 170 first chuck norris pages of 4q.cc site to disk
for i in $(seq 1 170)
do
    echo -n " $i"
    # only store facts
    wget -qO - \
       "http://4q.cc/index.php?pid=listfacts&person=chuck&page=$i" \
        | grep "index.php?pid=fact&person=chuck" >> $ffile
done
echo ""
echo -n "Post-processing facts..."
# remove unnecessary html code
perl -pi -e "s/.*id=.{32,32}\">//g;s/<\/a>.*//g" $ffile
# replace most common html entities
perl -pi -e "s/"/\"/g" $ffile
perl -pi -e "s/&/&/g" $ffile
# remove empty lines
perl -ni -e "print unless /pid=/" $ffile
# remove redundant lines
cat $ffile |sort |uniq > /tmp/chuckfacts.tmp
mv /tmp/chuckfacts.tmp $ffile
new=$(wc -l $ffile |sed "s/\s.*//g")
echo " OK"
echo "Generated $(($new-$old)) new facts ($new in total) facts."
# show how to add a fortune-like command to bashrc
echo ""
echo "You can add this to your ~/.bashrc file:"
echo 'test -s '$ffile' && cowsay -f $(ls /usr/share/cowsay/cows
| shuf |head -1) "$(cat '$ffile' |shuf |head -1)"'
Mira que no me aburro a veces ni nada eh…
11.12.09Google’s “go” simple & stupid benchmark (2nd round: memspeed)
Continued from Round 1: I/O
Thanks to Juanval for the suggestion.
$ cat hello.cpp && g++ hello.cpp &&
> time for i in $(seq 10); do ./a.out; done
int main (int argc, char** argv)
{
    const int size = 250;
    int a[size],b[size],c[size];
    for(int i=0;i<size;++i)
        for(int j=0;j<size;++j)
            for(int k=0;k<size;++k)
                c[k]+=a[i]*b[j];
}
real	0m1.041s
user	0m0.944s
sys	0m0.020s
$ cat hello.py &&
> time for i in $(seq 10); do python hello.py; done
size = 250
a,b,c = [0]*size, [0]*size, [0]*size
for i in a:
    for j in b:
        for k in range(0,size):
            c[k] += i*j
real	1m7.210s
user	1m4.924s
sys	0m0.084s
$ cat hello.go && 8g hello.go && 8l hello.8 &&
> time for i in $(seq 10); do ./8.out; done
package main
func main()
{
    var a,b,c [250]int;
    for i := range a
    {
        for j := range b
        {
            for k := range c
            {
                c[k] += a[i] * b[j];
            }
        }
    }
}
real	0m3.000s
user	0m2.812s
sys	0m0.020s
11.11.09 Google’s “go” simple & stupid benchmark (1st round: I/O)
Systems programming language? They gotta be kiddin…
$ cat hello.cpp && g++ hello.cpp &&
> time for i in $(seq 100); do ./a.out >/dev/null; done

#include <stdio.h>
int main (int argc, char** argv)
{
    for (int i=10000;i--;)
    {
        printf("hello, world\n");
    }
}

real 0m0.427s
user 0m0.220s
sys 0m0.164s
$ cat hello.py &&
> time for i in $(seq 100); do python hello.py >/dev/null; done

for i in range(1,10001):
    print "hello, world"

real 0m3.809s
user 0m2.800s
sys 0m0.724s
$ cat hello.go && 8g hello.go && 8l hello.8 &&
> time for i in $(seq 100); do ./8.out >/dev/null; done

package main
import "fmt"
func main()
{
    for i:=10000;i>0;i--
    {
        fmt.Printf("hello, world\n")
    }
}

real 0m7.528s
user 0m6.388s
sys 0m0.664s
Continued in Round 2: memspeed
09.11.09Puls, 256 bytes intro by Arriola
This post is twice the size of Puls 😯
05.16.09Little Big Planet feat. Daft Punk
Hacía mucho que no posteaba nada por aquí, así que ahí va un post facilón de mítico video empotrao xD
04.3.09Ladies and gentlemen, may I introduce you…
Just a small vid (edited by Silverghost) of the first day of my new baby bimmer, a 118D 5d. More info, pictures and a thorough review coming soon!
Un montaje (editao por Javi) del primer día del peque, mi nuevo 118D 5p. Otro dia con más tiempo le hago una review en plan, con foticos y esas chorradas 🙂 .
En efecto, éste es el digno sucesor elegido para el viejo Renault 21.
So yeah, that’s the worthy replacement for the now sadly defunct Renault 21.


