Surfing the electromagnetic waves – Debugging IEEE 802.11 with Wi-Spy
Some months ago, when I moved to this house, I found it was pretty difficult to get any WiFi device to connect to my wireless home network. Recently I tried debugging it, and these are the results…
Finding a proper WiFi channel
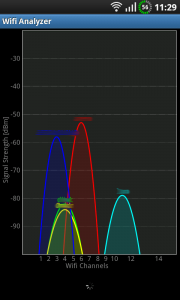
Finding an appropriate WiFi channel is part of the usual initial setup. Some routers and APs can choose channels automatically, but that’s not my case, so I had to resort to third party applications. One of my favourites is Wifi Analyzer for Android, which looks like this:
You can see what channels are used by which networks, and so the less used channels can be easily spotted. In my case, I decided to go for channel 10, which was pretty much free.
I tested Wi-Fi networks with 2 different routers, 1 dedicated AP, 2 Android phones, 1 iOS device, 1 laptop and 2 netbooks. Some specific combinations of them seemed to work, but most of them didn’t, sometimes even if they were in the same room as the access point.
How could this be?
Extending Wi-Fi range with WDS
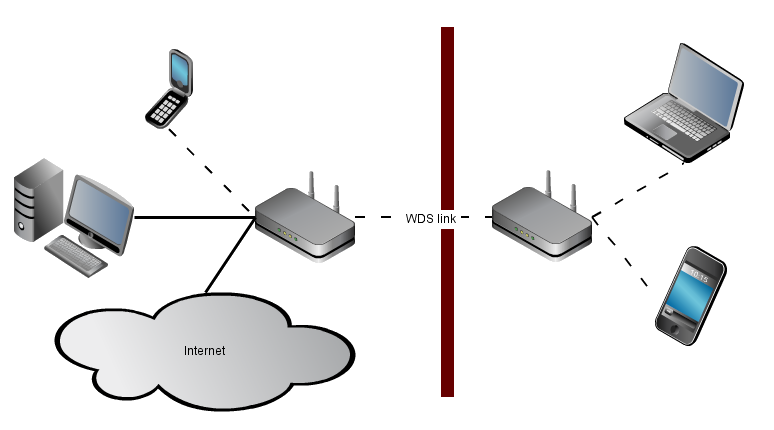
First of all, I thought that the thin room walls might be thicker than I initially supposed. Therefore, I decided to put an AP in each of the two rooms I wanted to wirelessly link together.
One of the easiest ways is to use a Wireless Distribution System (WDS). You set up each of the two APs with the other’s MAC address, do some reboots, and off you go.
However, simple ping tests demonstrated I was still having a packet loss as high as 40%. Even if the APs were just a meter and a wall away from each other!
Extending Wi-Fi range with FEC
 So the next option was to get a stronger signal in the other room, not with WDS, but using a Freaking Ethernet Cable. Once I got hold of a 10 meters cable, I plugged an AP at the end of the cable, in the other room.
To my dismay, it was barely possible to get a MacBook Pro to connect to the AP. There was a distance of 50 cm between the two!
So apparently, the wireless signal was being lost inside the room, and not due to the wall (this quickly ruled out the possibility of my walls being built of a thin layer of pure lead….).
Checking for electromagnetic interferences
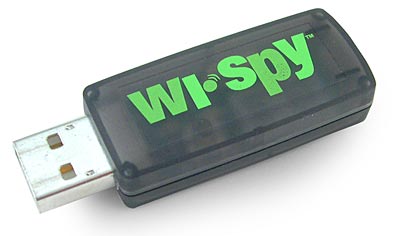
Next up, and thinking it could be some sort of EMI, I decided to get help at the mailing list where the local computer geek^H^H^Hurus hang around, the e-ghost. A few emails later, and thanks to the kindness of @txipi, I was holding a USB 2.4GHz spectrum analyzer on my hands.
The Wi-Spy 2.4i is a nice piece of hardware, with a similar functionality to the WiFi Analyzer program mentioned at the beginning of this article. Main difference being, it can detect all kinds of EM signals (not just those identified as wifi networks). For example, it’ll pick up signals coming from bluetooth devices, wireless security cameras, microwave ovens, baby monitors, etc.
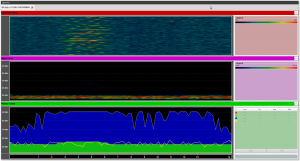
There’s some tools for linux, which can be installed with sudo apt-get install spectools, and look like this:
There’s also native software for Windows in the Wi-Spy CD which I sadly had to use, since I couldn’t configure the timescale of the spectrographs on linux spectools.
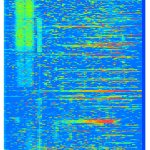
Once the software was correctly set up, I disabled my 802.11 network completely, and started logging data. Here’s the spectrograph for a period of about 30 non-continuous hours:
Vertical axis is time, horizontal axis is the frequency (wifi channel numbers are shown at the bottom for your convenience), and color axis is the maximum signal power.
Analyzing the 2.4GHz spectral graph
Several interesting patterns emerge from the graph:
 First of all, there’s these red-yellow dots all over the spectrograph. They seem to represent network scans made by wifi devices every once in a while. The pattern can be consistently repeated by turning the WiFi of any device OFF and then ON; or by simply trying to refresh the list of networks.
 Then there’s the prominent vertical patterns hovering around channels 1, 2 and 3. These obviously represent other existing WiFi networks around my house. There are other similar vertical patterns that cannot be easily appreciated with the color coding in this graph, but they’re logically low signal and won’t interfere much anyway.
Conclusion
I suspect it is this last type of interferences which makes my WiFi connectivity act so erratic. Sometimes, all my devices will connect just fine, but sometimes it’s impossible to connect even 10cm away from the AP.
It’s possible that a Police station located half a kilometer away (with direct line-of-sight) produces it, or maybe it’s the hardware of some neighbors. Building a huge Faraday cage is unthinkable, and hopping from channel to channel has proven useless, so I guess I’m irrevocably stuck with wired conections until I move to another house.
On the bright side, debugging these WiFi issues surely has been an interesting fun ride 🙂
Since I am by no means an expert in telecommunications, any further explanations or corrections are more than welcome. Feel free to use the comments box below!


March 9th, 2011 at 00:16
¡Cojonudo el artículo!… y una putada :S.
Fucking great article!… and sad :S.
March 11th, 2011 at 22:30
Ostia Bruno, muy buen post! Zorionak y a echar cable se ha dicho! 😀